2010年8月31日星期二

“I Want Your Money”

In the interests of political fairness, here is a trailer for a documentary coming out in mid-October that takes aim at President Barack Obama’s economic policies.

Titled “I Want Your Money,” the controversial trailer has already gotten over 1.76 million views on YouTube. (Take that, Michael Moore!)

Here’s the description of the film:

“Set against the backdrop of America’s growing disproval of current economic policies, I WANT YOUR MONEY takes a provocative look at our nation’s deeply depressed economy using the words and actions of Presidents Reagan and Obama. The film exposes the shocking reality of a bloated government while offering alternatives to help steer the United States back towards firm fiscal ground.”

The right-leaning movie–which uses decidedly odd cartoons of Obama and Reagan–features the usual conservative suspects on the topic, such as Newt Gingrich, Mike Huckabee and Steve Forbes. And it makes Speaker of the House Nancy Pelosi look nuts.

In other words, a Tea Party party!

2010年8月30日星期一

SCVNGR’s Seth Priebatsch Talks About Geolocation Wars, Facebook Places and More!

Last week, SCVNGR integrated its third-party social geolocation game service into the Facebook Places mega-location offering.

As it turned out, BoomTown was in Beantown–as in Boston–for a lovely wedding, so I took some prenuptial time to visit SCVNGR’s HQ in Cambridge, Mass., to talk to its founder, Seth Priebatsch.

In the launch last week, SCVNGR was one of a series of start-ups in the geolocation arena–such as Foursquare and Gowalla–that announced their cooperation with the giant social networking site’s effort to include their services into the offering using its social graph APIs.

SCVNGR’s take in the geolocation race is to allow users to do check-ins, complete challenges and earn points for rewards on mobile devices such as Apple’s (AAPL) iPhone and Google (GOOG) Android devices.

The idea came from an entrepreneur competition the high-energy Priebasch won as a freshman at Princeton University, which he left soon after to found SCVNGR.

It has raised about $5 million in funding from venture outfits such as Highland Capital Partners and Google Ventures–an investment that only adds to the irony here, since the search giant itself is about to launch a new social service to compete with Facebook.

2010年8月29日星期日

Google TV’s New Pitch: Let Us Scare the Crap Out of You

Google TV is creeping out Hollywood studios, but average consumers don’t know a thing about it.

Solution: Logitech, one of Google’s partners, will help scare the rest of us, too.

2010年8月27日星期五

How to change iPhone Wallpaper

Here are the easy steps you can take to change iPhone Wallpaper easily.

Make preparations:
Step 1: Find an image that you would like to use as wallpaper from iPhone Wallpaper.
Step 2: Right-click on a PC or control-click on an Apple computer and select "Save As" to save the image to your computer. Save it to your "My Pictures" folder or iPhoto library on a PC or Apple respectively, or wherever you prefer to store your images on your computer as long as you will be able to easily locate it.
Step 3: Connect the iPhone to your computer with the USB cable and wait for iTunes to launch itself automatically. Click on the "Photos" tab in the side panel.
Step 4: Click on the "Sync Photos From:" tab in the "Photos" menu on iTunes and locate the folder where your photos are stored. Select all of the images that you would like to transfer your to iPhone. Click on "Sync" in iTunes to transfer all of the photos to your iPhone.

Change iPhone Wallpaper
Step 1: Tap Settings on the iPhone’s home screen:

Change iPhone Wallpaper

Step 2: Tap the Wallpaper tab:

Wallpaper Tab in iPhone Settings

Several tabs should appear, including one that says Wallpaper. You can tap any of the tabs to select wallpaper for the iPhone. The Wallpaper tab features a collection of pictures supplied by Apple. The other tabs feature pictures you have added to the iPhone, including those taken with the iPhone’s camera.

Wallpaper Selections

Step 3: Tap any picture. A preview screen of the wallpaper will appear, along with the words Move and Scale at the top. You can pinch and reverse pinch the picture to resize. The transparent bars at the top and bottom simulate the bars for the clock and Slide to unlock that will eventually display on top of your wallpaper.
In the example below you can see that the heads of the two peoples will be partially covered by the top bar:

Resize iPhone Wallpaper

To fix, I will reverse pinch to expand the picture, then drag the picture so that their faces appear in the center:

Resize iPhone Wallpaper
Step 4:
Tap Set Wallpaper to finish.
To view your new iPhone wallpaper, put the iPhone to sleep by pressing the sleep button on the top of the iPhone. Then hit the home button to wake the iPhone, and you should see the wallpaper.
Note the position of the clock and Slide to unlock transparent bars. If you’re unhappy with the position of the wallpaper, repeat the steps above.

2010年8月25日星期三

How to Convert video and DVD to DV for DVD Studio Pro, Final Cut Pro, iMovie

This is a tutorial on how to convert video and DVD to DV for DVD Studio Pro, Final Cut Pro, iMovie.
Here are 2 parts:
Part 1, How to convert DVD to DV on Mac?
Part 2, How to convert videos such FLV to DVD on Mac?

Part 1, How to convert DVD to DV on Mac?
You need the following two software:
Aiseesoft DVD Ripper for Mac
MPEG Streamclip
Step 1, Rip DVD to formats that are compatible with MPEG Streamclip
Many free Mac DVD Rippers don't support ripping encrypted DVD. We recommend you Aiseesoft DVD Ripper for Mac (Intel Version, PPC Version) which can rip encrypted DVD to many other video formats such as MP4, FLV, MOV etc.
MPEG Streamclip Supports the following input formats: MPEG, VOB, PS, M2P, MOD, VRO, DAT, MOV, DV, AVI, MP4, TS, M2T, MMV, REC, VID, AUD, AVR, VDR, PVR, TP0, TOD, M2V, M1V, MPV, AIFF, M1A, MP2, MPA, AC3.
You need to use DVD Ripper for Mac to rip DVD to any video formats such as MP4, MOV compatible with MPEG Streamclip. After conversion, you can find the converted files in the output folder.
Tutorial on how to use DVD Ripper for Mac

Step 2, use MPEG Streamclip to convert videos to DV
Click 'File'>'Open Flies' to Open the converted files in the output folder.
Click 'File'>'Export to DV' to convert videos to DV.
That’s all.
Now you have converted DVD to DV on Mac. Then you can put the DV to DVD Studio Pro, Final Cut Pro, iMovie to edit.

MPEG Streamclip - convert videos to DV

Part 2, How to convert videos such as FLV to DV on Mac?
Software you need:
Aiseesoft Video Converter for Mac
MPEG Streamclip
Step 1, Convert videos to the formats compatible with MPEG Streamclip (Optional)
MPEG Streamclip Supports input formats: MPEG, VOB, PS, M2P, MOD, VRO, DAT, MOV, DV, AVI, MP4, TS, M2T, MMV, REC, VID, AUD, AVR, VDR, PVR, TP0, TOD, M2V, M1V, MPV, AIFF, M1A, MP2, MPA, AC3.
If your videos such as FLV, 3GP, 3G2, WMV, XVID are not the above formats, you need to use Video Converter for Mac to convert your videos to MPEG Streamclip format.
Here is a tutorial on how to use Video Converter for Mac.
If your videos are compatible with MPEG Streamclip, please go to step 2.

Step 2, use MPEG Streamclip to convert videos to DV on Mac
Click “File”>”Open Flies” to Open the converted files in the output folder.
Click “File”>”Export to DV” to convert videos to DV.
That’s all. Now you are succeed in convert DVD to DV on Mac.
Then you can put the DV to DVD Studio Pro, Final Cut Pro, iMovie to edit.

2010年8月24日星期二

How to Play all Video Files on Xbox 360 with Mac

Video to Xbox 360

This is a step by step guide on how to play any video file on your Xbox 360 from your Apple Mac computer.
How to play any video file on your Xbox 360 with your Mac – Only $35.00 Video Converter for Mac can clear up all your problem.

Here Is What You Will Need:
Xbox 360 - Preferably the Elite version… just because its black. And has black controllers.
Apple Computer - iMac, MacBook Pro, Apple Air, etc.
Video Converter for Mac Only $35.00 - Has a Free Trial!

How to play any video file on your Xbox 360 with your Mac:
Step 1, Convert videos to mp4 format that compatible with Xbox 360.
Choose a small video to test for you first video, as encoding and conversion times can be lengthy if you choose a full movie. Try downloading a trailer for a movie in your favorite format that the Xbox 360 can’t read. Like: AVI, and a lot of other weird formats.
Open up Video Converter for Mac. Video Converter for Mac is a phenomenal video conversion tool, it can convert video formats from one to another with perfect output quality and high conversion speed for Mac OS X users. It supports all popular video formats including flv, MPEG1, MPEG2, MP4, 3GP, 3G2, AVI, M2TS, MPEG TS/TP (for HD Video), M4V, etc.
At the bottom of Video Converter, it shows the format we can convert to. Choose MP4. It is the best.
Choose output folder such as “Open Folder”.

Video Converter for Mac - merge

At the bottom right, click on the “Start” button. Then wait… , And the conversion speed is out of your surprise.

Step 2, connect your Mac and Xbox 360
Before you start configuring, open up Terminal (in Applications -> Utilities) and type "ifconfig en0" (zero, not a capital-o). You're looking for the bit that says "inet xxx.xxx.xxx.xxx". In my case, the number I get here is 192.168.2.1 Second, note down the IP address of your wireless router, which in my case is 192.168.0.1

On your Mac
1. Connect your Mac to your wireless internet connection
2. Connect your Xbox 360 to your Mac via Ethernet
3. In System Preferences -> Sharing, enable Internet Sharing between your Airport and Ethernet connection

On your Xbox 360
1. Start up your Xbox and navigate to the Network settings menu
2. Under IP address, enter the number you got from the "ifconfig en0" command earlier on, but with the final number one place higher. In my case, I take the 192.168.2.1, and input 192.168.2.2 in the IP address box on my Xbox 360.
3. Under subnet, input 255.255.255.0
4. Under router/gateway, enter the number you got earlier from the "ifconfig en0" command. In my case, that's "192.168.2.1"
5. Move onto DNS. Enter the IP address of your wireless router (in my case, "192.168.0.1") in both the primary and secondary IP address fields
6. Leave PPPoE and advanced settings blank (i.e. OFF and Automatic)
7. You should now be able to connect to Xbox Live via your internet sharing Mac

Step 3, Play Video File on Xbox 360:
First, on your Mac, open up your new file in VLC and in QuickTime. Make sure it can play in both (Not necessarily at the same time). If you have done that, now it is time to move to your 360. Follow these instructions:
Turn on your Xbox 360

Turn Xbox 360

Navigate over to the “Media Tab”, and select the “Videos” option.

Xbox 360 - Media Tab

Note: Since the Xbox 360 Dashboard update of about 6 months ago, once you click on”Videos” it will just show you all of the videos on your Xbox 360 hard drive. So presses “X” to change the current source. Then browse down to your Apple / Mac computer. Mine is an iMac.

Click on the “Movies Folder”. That is where you should have saved the file there earlier.
Now browse through your video files and select your sweet, newly converted video file, and play it!put Video on Xbox 360

All the operations is just like pie. So you can watch any your favorite video on your Xbox 36o from your Mac easily Now. Watch and Enjoy it!

2010年8月23日星期一

We’re All Frogs Boiling in Water

There’s an old (semi true) parable about frogs boiling in water. While not literal it’s a fun and instructive metaphor for change.

It goes like this: if you put a frog in boiling water it will sense the hot water and immediately jump out yet if you put it into cold water and very gradually turn up the temperature in the water the frog won’t notice and will stay in until it has boiled to death.

There’s some metaphorical truth to this in our everyday lives. When we’re faced with shocking changes the societal impact becomes immediate and obvious. An example would be an economic shocks that caused mass job loss and unemployment as happened after the dot-com crash, 9/11 and again in Sept 08. In times like these we reflect more about life in general and about the impacts technology has on our lives and on our society.

But most technology impacts us in imperceptible frog-boiling like ways.

Read the rest of this post on the original site »

2010年8月22日星期日

And With an Arrest, Trial and Conviction, We Can Make an Album

Sign o’ the times. Making its debut on the Billboard Hot 100 hit list at No. 89–just below Justin Bieber and Young Jeezy, and a spot above Brad Paisley–is an Internet interloper: The “Bed Intruder Song,” the latest in the Auto-Tune the News series from the Gregory Brothers. It is undoubtedly the catchiest song ever adapted from a TV interview of a man who thwarted an attempted rape. The video became an immediate YouTube hit when it was posted a few weeks ago, and hot sales of an expanded version in the iTunes music store propelled the song onto the mainstream charts.

2010年8月18日星期三

Bad Apple Pleads Not Guilty

Paul Devine, the former Apple manager accused of taking some $2.5 million in kickbacks from Asian suppliers in return for information that helped them win the company’s business, has pleaded not guilty to charges of wire fraud and conspiracy. Apple claims Devine, over the course of more than three years, gave at least six Apple contractors product roadmaps, sales reports and other information that enabled them to win contracts to provide components for the iPod and iPhone.

2010年8月17日星期二

How to play iPod video on TV

You may often confused with how to play iPod video on TV without Apple TV? Here is a guide to do this.
Note: This method is not usable for the 6th generation iPod.

What You'll Need
In order to get your iPod connected properly to your TV, you'll need the following items on hand:
A video-capable iPod. Any color will do.
An iPod-compatible video. Load it onto your iPod through iTunes.
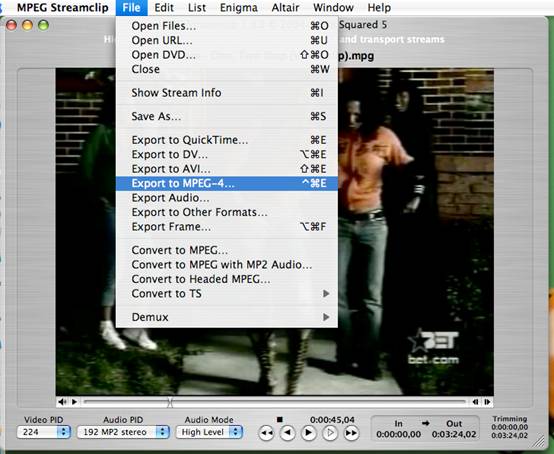
Note: iPod accepts mp4 video detail as: MPEG-4 video, up to 2.5 Mbps, 640 by 480 pixels, 30 frames per sec., Simple Profile with AAC-LC audio up to 160 Kbps, 48 kHz, stereo audio in .m4v, .mp4, and .mov file formats.
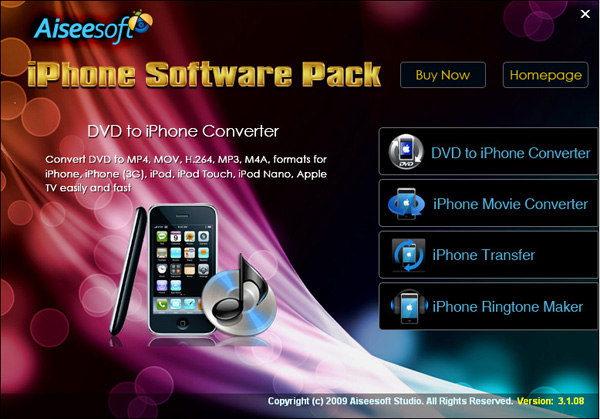
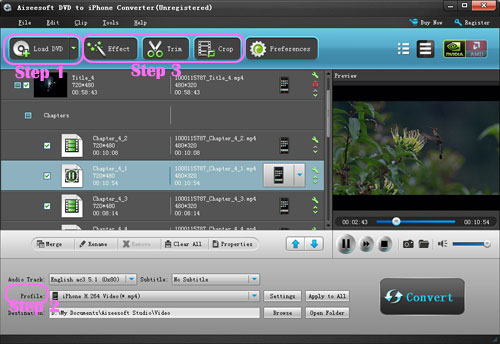
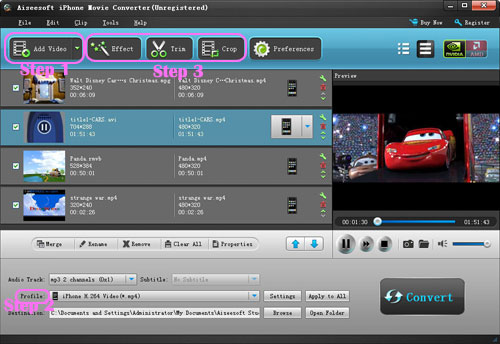
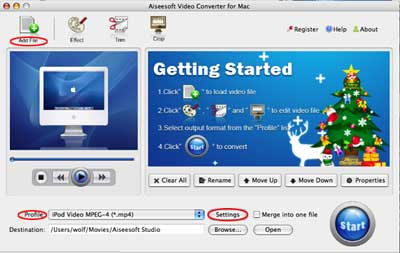
If your videos are not iPod format files, you can use Aiseesoft iPod Video Converter for Mac to convert videos to iPod format files. Aiseesoft iPod Video Converter for Mac is one of the best video to iPod converters on Mac os which can convert MP4, 3GP, AVI, WMV, RM, MPEG, and FLV to iPod video with very high quality and various output settings in high speed(>300%). If you use Windows, you can use iPod movie converter for windows.
An A/V cable. If you don't already have an eighth-inch-to-RCA cable, you can pick one up on eBay for five or six bucks shipped. Search for "camcorder A/V cable." Remember, you want a three-plug yellow/red/white RCA connection at one end and a three-banded eighth-inch (3.5mm) A/V plug at the other.
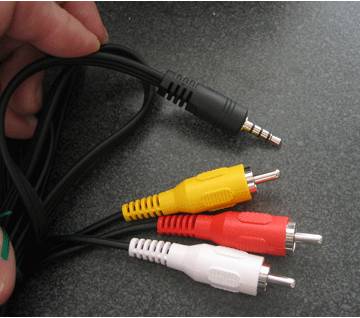
A/V cable
Figure 1. A camcorder A/V cable has a three-plug RCA connection at one end and a three-banded 1/8" plug at the other

Setting Up Your iPod Video Options
Setting up your iPod video options lets you control how you export video. The iPod Video Options screen selects how your iPod handles video file playback.
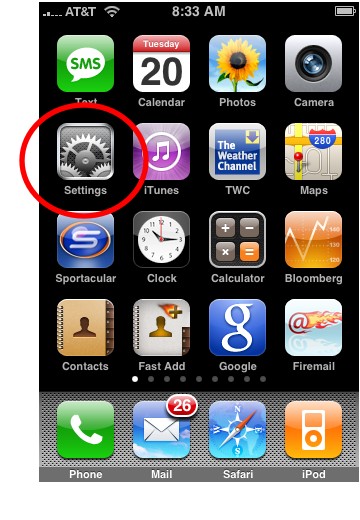
To open these settings, choose Videos -> Video Settings from your main iPod menu. This screen offers three settings: TV Out, TV Signal and Widescreen. Adjust to produce the video playback style you need.
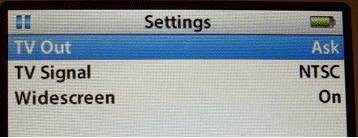
Play iPod Video on TV
Figure 2. Videos -> Video Settings controls the way your iPod plays back video files

TV Out
Whenever you play a video file, your iPod must make a choice. Video iPods either play video on the built-in screen or they transmit a video signal out of the microphone jack. They don't do both. The TV Out option controls which behavior occurs.
Use this setting to choose from:
No. Playback remains on the iPod itself.
Yes. A TV signal is produced.
Ask. The iPod prompts you whenever you play a video file.
I always use the Ask option. Yes, it does add an extra step whenever I play a video file, but it gives me the flexibility to choose playback behavior on a case-by-case basis. I like that.

TV Signal
European and Australian television sets use a different signal standard than those used in America and Japan. If you live in the U.S., your TV works with the NTSC standard. European countries mostly use PAL. Make sure you've selected the correct signal for your country.
Widescreen
iPods can play back widescreen video, if only on exported video. The built-in screen uses a traditional 4:3 screen ratio, rather than widescreen's 16:9 proportions. Choose Yes to produce a widescreen signal, or No to export the traditional TV output.
Connecting the iPod to TV
It takes a few steps to connect your iPod to your TV. Start by inserting the A/V cord's eighth-inch plug into your iPod's earphone jack. In it goes, schnickt. Couldn't be eas.
Here's where it gets a little tricky. In order to make your TV play back the iPod signal, you've got to redirect the outputs. You can't just plug the yellow RCA plug into the yellow RCA jack and the red into the red or the white into the white. No. Those geniuses at Apple send the video signal over the red RCA output. (Normally it arrives on yellow.) The sound comes through the white and yellow plugs.
I ended up going to an Apple store and testing this on iPod after iPod. They all have this quirk. It was intentional. But hey, it's proprietary. Woohoo. So here's what you have to do:
- Plug the red RCA plug into your TV's yellow RCA jack.
- Plug the yellow RCA plug into your TV's white RCA jack.
- Plug the white RCA plug into your TV's red RCA jack.

Play iPod video on TVPlay iPod video on TV
Figure 3. Left: TV jacks, unplugged; right: TV jacks, plugged with A/V cable.

After making all of these connections, you're physically ready to begin playback.
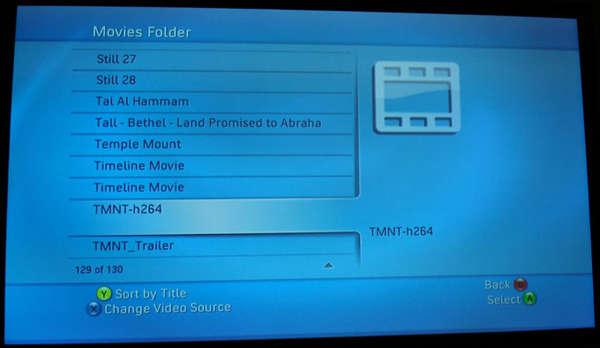
Playing Your Video
On your iPod, navigate to the movie you want to watch and select it. Your iPod prompts you to choose whether to play the video with TV Off or TV On. (You set the TV Out option to "Ask," remember?) Choose TV On.Play iPod video on TV
Figure 4. Choose TV On to redirect the video through the earphone jack.
As your video starts, a status screen appears on your iPod and the video plays back on your television. The status screen tracks playback progress, just as it would in iTunes.Play ipod video on tv
Figure 5. The iPod video status screen shows playback progress.
Leave the television volume control at normal levels and use the iPod volume control to adjust the audio. The audio and video should both sound and look excellent.

2010年8月15日星期日

How to use Mac The Ripper to rip DVD to iPod, iPhone, etc. on Mac

Part 1. Use MacTheRipper to minus the copy protections for free
Mac The Ripper is a free DVD ripper (extractor) for Mac OS X. It can extract commercial DVD movies to your hard drive, minus all the copy protections and region controls put in place by DVD publishers. Mac The Ripper removes CSS encryption, Macrovision protection, and sets the disc's region code to '0' for region-free by default, and is capable of removing RCE region protection as well, making an unrestricted copy of any DVD movie you own. It doesn't rely on the DVD drive to get the CSS decryption keys, so that means that you do not need to play the DVD with DVD Player in order to rip it to your hard drive unprotected. MacThe Ripper is also capable of removing UOPs, or User Operation Prohibitions, which are the settings that prevent you from skipping or fast-forwarding certain parts of DVDs, such as FBI warnings, previews, logos, intros, etc. Mac The Ripper is also able to extract discs with the new ARccOS protection, as well as DVDs that have been damaged or improperly mastered.
WARNING: Disabling UOPs can break the navigation on certain DVDs. If you disable UOPs, be sure to verify the DVD with DVD Player before you burn it to DVD±R disc.

Step 1. install MacThe Ripper
Download it from: http://www.Mactheripper.org. To install Mac The Ripper, simply mount the .dmg archive by double-clicking it, and copy the Mac The Ripper application from it to your Applications folder (or wherever you want it ), along with this Mac The Ripper Manual if you need it.
Step 2. convert DVD for free
To use Mac The Ripper, you should insert your DVD movie into your DVD drive and launch the Mac The Ripper application. Then, you should set the RCE options if applicable. If Mac The Ripper displays 'DISC RCE: -CLEAR-' after scanning the DVD in the drive, you can leave the 'RCE Region' popup menu on 'OFF', as it is by default. Only (and always) set the 'RCE Region' to 'OFF' when it says that RCE is '-CLEAR-'.
Once you've selected the type of extraction and options you want, you can go back to the 'Disc' tab and click the 'GO!' button (or hit the 'Enter' or 'Return' key) to start the extraction.

Mac The Ripper
Mac The Ripper - dvd extraction

Step 3, finish extract movie from DVD.

Mac The Ripper - extract movie from DVD

You can find a folder in the save location. The output files extracted by MacTheRipper are saved as .VOB format .
Tip: RCE region protection
region 1: North America; U.S. territories; Bermuda
region 2: Europe; Western Asia; Kingdom of the Netherlands; Egypt, Japan, Lesotho, South Africa, Swaziland; British overseas territories, French overseas territories; Greenland.
region 3: East and Southeast Asia
region 4: Oceania; Central and South America; Caribbean; Mexico
region 5: Africa, Central and South Asia, Belarus, India, Mongolia, North Korea, Russia, Ukraine
region 6: Mainland China

Part 2. Convert the .VOB files to other video, audio formats compatible with iPod, PSP
After using Mac The Ripper to minus the copy protections, we can use Aiseesoft Video Converter for Mac to convert .VOB files to formats that compatible with popular players such as iPod, iPhone(iPhone 3G), Apple TV, PSP, Zune, etc.
Step 1:
Download and install Aiseesoft Video Converter for Mac
Note: If you just want to convert .vob file for iPod, You can choose this powerful iPod video converter for Mac. It can convert .VOB file to iPod video and iPod audio on Mac OS with powerful functions and fast converting speed!
Step 2:
Run Aiseesoft Video Converter for Mac, click 'Add File' button to import the .VOB files, choose the output format, then click 'Start' to start the conversion. If you want to put the video on PowerPoint, you can choose .avi as output format.
Tip: Aiseesoft DVD Ripper for Mac can rip DVD to all popular video and audio formats directly. It can rip DVD to videos including MP4, AVI, MOV, M4V, 3GP, MPG, MPEG, FLV, etc and can convert DVD audio to MP3, M4A, AAC, AC3, etc. It is more easy to use than Mac the ripper. You can download it for free and have a try.
Step 3:
After the conversion is finished, You can transfer the converted files to the players. For example, use iTunes to transfer the mp4 video to your iPod, here are the steps:
1. Open iTunes and click "File" to add your converted videos to iTunes library.
2. Plug in your iPod to computer, then iTunes will detect your iPod as a device.
3. Select your iPod device on the left panel of iTunes, click "Movies" tab, check the videos you want to sync and click "Apply", done.
Recommend: DVD Converter Suite for Mac: all-in-one solution to convert DVD and Video to MP4, AVI, FLV, MOV, MKV, ASF, directly for your iPhone, iPod, PSP, iPod touch, Zune, etc. on Mac OS X.

How to make iPhone Ringtones on Mac and Windows for FREE

I have many iPhone Ringtones on my iPhone, and I change them once one day. But I don’t buy them online. I just make iPhone Ringtones myself by Ringtone Maker Shareware. Actually, iPhone Ringtone maker is m4r Ringtone Maker, such as mp3 Ringtone Converter, WMA Ringtone Converter and WAV Ringtone Converter. There are also iPhone Ringtone Converter for Mac or iPhone Ringtone Creator Mac.

Here I will share how to make iPhone ringtones on Windows and Mac.
For Windows:
Firstly, you need download iPhone Ringtone Maker.

iPhone Ringtone Maker

Step 1: Load Music
Click “Browse” on the right side of “Input File” to find your music that you want to make as your iPhone ringtone and click “Open” to load it into iPhone Ringtone shareware.
Step 2: Choose iPhone Ringtones
1. Drag your “Start Slider” to the beginning of the “Slider Bar” and “End Slider” to the end, then Listen iPhone Ringtone 
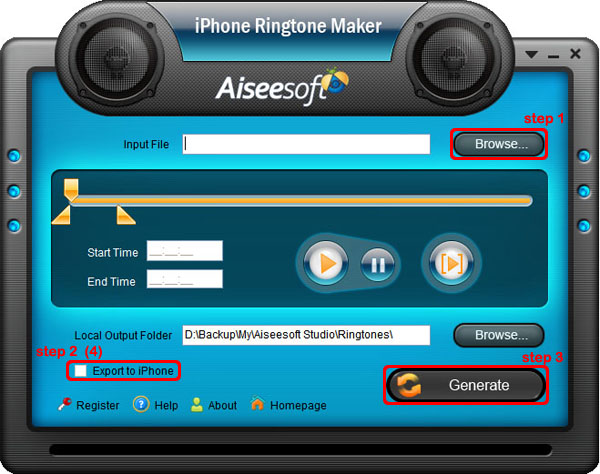
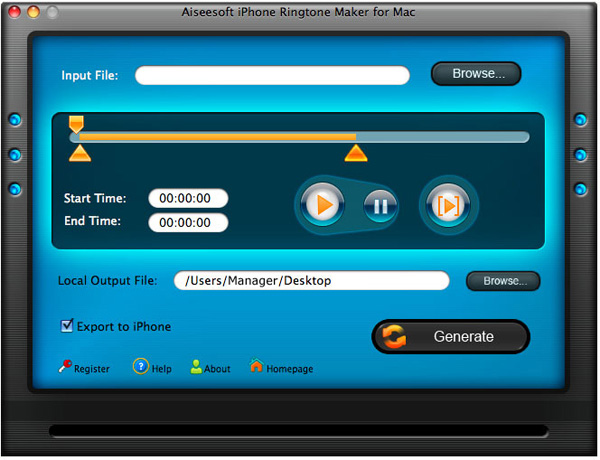
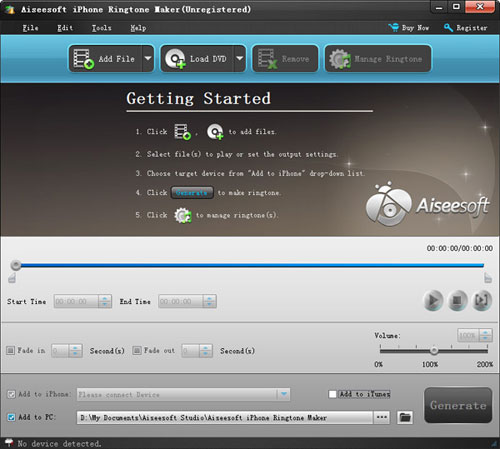
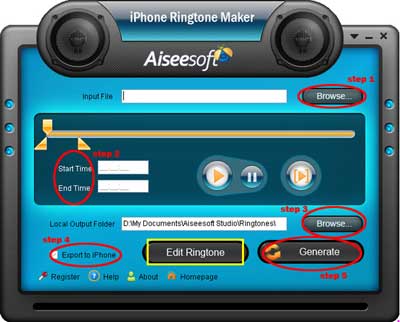
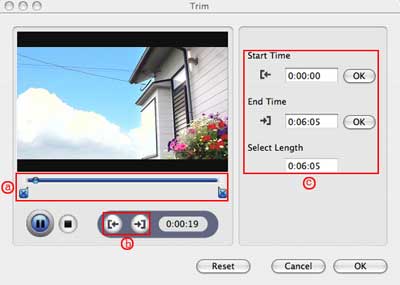
to listen your whole audio file.>br/>2. a. Drag the “Start Slider” to find where is the beginning of your ringtone and Drag “End Slider” to make an End of it.
b. Type the exact “Start Time” and “End Time” in the box to choose your ringtone.
3. ClickPre-listen iPhone Ringtoneto pre-listen your ringtone.
4. If you want to put your ringtone directly on your iPhone, just plug your iPhone to your computer and check “Export to iPhone” (4). If you just want to put it on your computer, click “Browse” on the right of “Local Output Folder” to find a place to put it.
Step 3: Generate iPhone Ringtones After you have done the 3 steps, just click “Generate” to make your iPhone ringtones.

For Mac:
If you are a Mac user, you need to find iPhone Ringtone Converter for Mac or iPhone Ringtone Maker for Mac.
Here I have one for you, just download this iPhone Ringtone Maker for Mac.

iPhone Ringtone Maker for Mac
The process of making your own iPhone ringtone on Mac is the same as on Windows.
Hope you enjoy this DIY process.

2010年8月13日星期五

Two Days After Steve Slater’s Slide Ride, JetBlue Comes Back to the Web

Be honest–if you ran JetBlue, you’d want to stay quiet, too. Right?

But the airline, which gets lots of credit for engaging its customers on the Web, on Facebook and on Twitter, had to speak up eventually: Steve Slater’s freakout/fun ride was a full two days ago, and the former flight attendant is now a full-fledged media sensation. But JetBlue (JBLU) has been in a defensive crouch, more or less, since then.

So here’s the full text of JetBlue’s re-entry into the Web, via a blog post it put up this afternoon:

Sometimes the weird news is about us…

It wouldn’t be fair for us to point out absurdities in other corners of the industry without acknowledging when it’s about us. Well, this week’s news certainly falls into that category. Perhaps you heard a little story about one of our flight attendants? While we can’t discuss the details of what is an ongoing investigation, plenty of others have already formed opinions on the matter. Like, the entire Internet. (The reason we’re not commenting is that we respect the privacy of the individual. People can speak on their own behalf; we won’t do it for them.)

While this episode may feed your inner Office Space, we just want to take this space to recognize our 2,300 fantastic, awesome and professional Inflight Crewmembers for delivering the JetBlue Experience you’ve come to expect of us.

You can’t make this shtick up.

Pretty, good, no? Right tone, right tactic–acknowledge the news and acknowledge the reason why you can’t say much about it, which your media-savvy audience will understand.

My only critique is that JetBlue used the wrong YouTube link.

2010年8月11日星期三

Comparison Shopping Online Is For Small Businesses Too

Efficient comparison shopping is a major benefit for consumers who purchase products online. A new start-up, TransFS LLC, is seeking to bring similar benefits to small businesses.

TransFS, which stands for Transparent Financial Services, is starting with providing merchants a comparison of credit-card processing companies. To back its business, TransFs raised $510,000 in seed funding from Hyde Park Angels, Dave McClure’s 500Startups and other, unnamed angels.

“It’s really complicated because there are a lot of providers,” said Sean Harper, co-founder and chief executive of TransFS. “No one knows how they stack up with each other with respect to reputation and capabilities and pricing rules, which are always negotiated.”

Read the rest of this post on the original site

2010年8月10日星期二

Somewhere Else You Can’t Get Spotify

Spotify, the best music service you can’t listen to in the U.S.*, released an update to its iPhone app today. So if that’s relevant to you, go check it out — the tweaks seem to be fairly minor.

But the update is a good time to point out that U.S. users aren’t the only ones who can’t get the streaming music service. iPad users are also out of luck.

Mobile is supposed to be the key to Spotify’s success — full access to the service on the iPhone is the key selling point for the service’s paid version. So why not offer access for Apple’s (AAPL) tablet?

Spotify is officially mum on the subject. But people I’ve talked to who understand the company’s thinking say the reason is simple: For now, music apps aren’t great on the iPad.

That’s because the device doesn’t allow multitasking, which means that any music that’s not played via iTunes becomes an all-or-nothing experience on the iPad. The Spotify folks aren’t the only ones who feel that way — in June Pandora CTO Tom Conrad described the tablet as a “pound-and-a-half paperweight.”

Then again, Conrad previously expressed distaste for Google’s (GOOG) Android platform, and now Android is a very big deal for his music service. And people seem to like Pandora on the iPad, anyway – its currently the 10th-most popular free app at iTunes.

In any case, it’s reasonable to assume that Apple will eventually port its latest OS4 operating system, which does allow multitasking, from the iPhone to the iPad. Which should give the Spotify folks a whole lot of incentive to work with the device.

And then we can go back to griping about not getting Spotify in the States.

*Of course, lots of people in the U.S. can listen to Spotify — that’s why the Web is full of U.S. residents going on and on about how great it is. The Spotify folks have been very clever about making sure that plenty of writers, bloggers, and early adopting digerati some trial accounts in this country.

2010年8月9日星期一

How to upload videos to YouTube from iMovie

Making movies on your Mac is fun and easy, but how do you share them with the world? Many people choose to upload videos to YouTube from iMovie.
Part 1, How to upload videos to YouTube from iMovie HD
Part 2, How to upload videos to YouTube from iMovie

Part 1, How to upload videos to YouTube from iMovie HD
1. Make sure your video is the one you want to upload, then click the share button in the menu bar.
2. Select the QuickTime option.

upload video to youtube

3. Click on the menu for your compression options and select web.

upload video to youtube

4. Save your movie to the desktop or somewhere else. Find your movie and click it once then press apple+I to get its information. Make sure it is less than 100 megabytes or YouTube will not accept it.
5. Log in to YouTube and click on the “upload” button at the top of the page.
6. Enter the name, category, tags and any other information you want for your video.
7. Next click on “upload a video” once you have finished entering your videos information.
8. Click on the “Choose File” button and choose your video file from were you saved it. Make sure its your compressed QuickTime video and not the iMovie file.
9. Lastly click on the “Upload Video” button, it may take a few minutes for your video to upload and it may take several hours for it to show up on YouTube.
I also recommend CD quality. You can save the movie to CD-ROM and then you can upload movie from iMovie HD to YouTube!

Part 2, How to upload videos to YouTube from iMovie
1. Make sure your video is the one you want to share, then click the share button in the menu bar and select YouTube.
2. Choose your YouTube account or create a new one
3. Confirm your sign in.
4. Select the category, name, description, and tags for your video.
5. Select your publish size and click Next
6. Now click the publish button.
7. Your video will be ready to watch on YouTube in 2-120 minutes.

Google has released basic software called Vidnik which is the quickest, simplest way to make movies using the built - in camera on your Macintosh and upload those movies to your YouTube account. You must first sign up for a free YouTube membership to upload videos.
Learn more: How to upload videos to YouTube easily and quickly on Mac?

2010年8月8日星期日

How to Rip DVD, Convert Video to iPhone, backup iPhone info, make iPhone Ringone For Windows/Mac

Recently, iPhone has became a really important part of our life. People use it to make a phone call, enjoy music and movies/videos, and play games. Today I will share you a really nice software pack, which can convert DVD and video to iPhone video/audio formats, backup iPhone info on your computer, and make iPhone ringtone easily.

What you need is just this nice Convert DVD Video to iPhone software

iPhone Software Pack

Part 1: How to convert DVD movies to iPhone
Use Aiseesoft DVD to iPhone Converter.

DVD to iPhone Converter

Step 1: Load DVD
Put your DVD in your DVD Drive and click “Load DVD” button

Step 2: Choose output profile and Settings
You can choose your output profile in the drop-list when you click profile list.
You can also adjust your settings, such as Resolution, Bitrate, so on.

Step 3: Edit Video
You can do “Trim”, “Crop”, “Merge into one file”and other video editing functions to make your video more enjoyable.

Click “Start” to begin you conversion. After few mins you can enjoy your DVD movies on your iPhone.

Part 2: How to convert videos to iPhone with iPhone Movie Converter

iPhone Movie Converter

Step 1: Add file
Click “Add File” button to add your video you want to put on your iPhone.

Step 2: Choose output profile and settings
You can choose your output profile in the drop-list when you click profile list.
You can also adjust your settings, such as Resolution, Bitrate and Encoder and so on.

Step 3: Edit Video
You can do “Trim”, “Crop”, “Merge into one file”and other video editing functions to make your video more enjoyable.

Click “Start” to begin you conversion. After few mins you can enjoy your videos on your iPhone.

Part 3: How to transfer songs and vdieos from iPhone to computer, from computer to iPhone and from iPhone to iPhone.

iPhone Transfer

Step 1: Click iPhone Transfer
Click “Computer to iPhone”(1) button, it will allow you to transfer songs and videos from your computer to iPhone easily.
Click “iPhone to Computer”(2) button, it will allow you to backup your songs and videos from iPhone to your computer.
Click “iPhone to iPhone”(3) button, it will allow you to transfer songs and videos from one iPhone to another iPhone dirrectly.

Part 4: How to make your own iPhone ringtone

iPhone Ringtone Maker

Step 1: Click iPhone Rigntone Maker and click “Browse” on the right side of "Input File" to import the file that you want to make ringtone from i.t

Step 2: Play it and listen the music to find the segment that you want to use it as ringtone. Then drag and click the start& end slider to set your wanted segment, or type the start & end time in the corresponding text box directly to get the exact segment. You also can pre-listen the converted audio before generate.

Step 3: Click “Browse” on the right side of "Local Output Folder" to choose the output destination.

Step 4: Check "Export to iPhone" option, the converted ringtone will be load to your iPhone directly.

Step 5: After all the settings are finished, click “Generate” to begin making your own iPhone ringtone.

For Mac users I recommend you Aiseesoft iPhone Software Pack for Mac

Using Aiseesoft iPhone Software Pack for Mac, you can convert any video/DVD to iPhone Mac, backup the audio, video files on iPod to Mac and import audio, video files or folders from Mac to your iPod without iTunes with the help of iPod Manager Mac, even make iPhone ringtone from AVI, MPEG, WMV, MP4, FLV, MKV, H.264/MPEG-4, DivX, XviD, MOV, RM, RMVB, MP3, WMA, AAC video and audio sources on Mac.

iPhone Software Pack for Mac

2010年8月6日星期五

How to Make iPhone Ringtone

You bought an iPhone and love all its features, but wish you didn't have to pay for your songs twice to get a ringtone. (We know that iPhone, iPhone 3G Ringtones use the file extension .M4R. And the users must pay $2 for a piece of song through Apple iTunes store). There are plenty of songs in your music library, but no way to make ringtones from any of them. Rihgt?

Actually, with a little bit of trickery (nothing illegal) you can create ringtones from any one of your non-DRM songs.

This works on both Mac and Windows PCs.

Window Users

You can create free iPhone Ringtones by yourself with Aiseesoft iPhone Ringtone Maker.
You can take the following step-by-step instructions to start.
Step 0: Download and install Aiseesoft iPhone Ringtone Maker.
After a short while, you can see the following interface:

iPhone Ringtone Maker

Step 1: Click "Browse" on the right side of "Input File" to import the file that you want to make ringtone from it.
Step 2: Play it and listen the music to find the segment that you want to use it as ringtone. Then drag and click the start & end slider to set your wanted segment, or type the start & end time in the corresponding text box directly to get the exact segment. You also can pre-listen the converted audio before generate.
Step 3: Click "Browse" on the right side of "Local Output Folder" to choose the output destination.
Step 4: Check "Export to iPhone" option, the converted ringtone will be load to your iPhone directly.
Step 5: After all the settings are finished, click "Generate" to begin making your own iPhone ringtone.

Key function
* Convert any video to iPhone ringtone M4R
* Create iPhone ringtone from any audio files
* Get any clips from video and audio
* Edit Added iPhone ringtones

Using Aiseesoft iPhone Ringtone Maker, you are free to edit the added iPhone ringtone by removing it or renaming it directly.

For Mac Users, please go to Aiseesoft iPhone Ringtone Maker for Mac.

2010年8月4日星期三

AOL Gets Out of Kayak

Forgive me if this is old news, but it seemed new to me: AOL says it has sold off its stake in Kayak, the giant travel site, for $19 million. The company mentions the deal as an aside in its Q2 earnings release and says the deal closed late last month. It had owned a chunk of Kayak since 2004; the sale is part of an overall slim-down effort that has seen the company dump Bebo and ICQ, among other assets.

2010年8月3日星期二

CBS’ Comcast Deal Clears the Deck for Hulu. Maybe Apple, Too.

The 10-year carriage deal that CBS and Comcast announced today is all about good old fashioned TV, delivered via cable pipes, to be consumed on your 42-inch plasma.

But the deal could also give Les Moonves and company the ability to strike less conventional distribution deals, too. Now that Comcast is out of the way, CBS could move forward with a Hulu deal, and perhaps the likes of an Apple TV product as well.

Make no mistake: The real focus of today’s deal is the money Comcast will fork over for the right to distribute CBS’ broadcast programming to its cable subscribers’ TV sets. Comcast and other cable guys have resisted paying the so-called retransmission fee for TV that’s available free over the airwaves. But one by one, they’re conceding and paying up, which means their customers will, too.

Barclays analyst Anthony DiClemente guesses Comcast’s CBS fee will start at 50 cents a month per subscriber and move well past $1 by the end of the deal, though I’ve heard grunts and murmurs from Black Rock that those numbers are low. Perhaps we’ll hear more during tomorrow’s earnings call.

And while the release announcing the deal notes that Comcast (CMCSA) gets online rights as part of the pact, the near-term impact for Web viewers will be very limited.

Specifically, if you’re a Comcast cable subscriber who pays for Showtime and/or The Movie Channel, you’ll soon be able to watch programming from those channels online, too. Good news for “Weeds” and “Dexter” fans, but that’s about it.

That said, down the road, CBS may start moving to a model where it pulls more of its broadcast TV shows like “CSI” off of the free Web and makes them available only to “authenticated” customers–Comcast subscribers and anyone else whose pipe provider has a deal with the broadcaster.

And that, in turn, gives the network the go-ahead to move forward with Hulu, Apple and every other player who also wants to sell online access to TV programming.

CBS had previously chatted with other outlets like Apple and Hulu–in part because it was interested, and in part because it was good for Comcast to know that it was interested. But now it has a framework for those deals: Comcast is paying us this much money for this much access to our shows. You’ll need to pay that amount or more.

So it shouldn’t be a surprise to see Moonves acknowledge his interest today in joining Hulu’s paid subscription service, which would mean patching things up with former online rivals News Corp.’s (NWS) Fox, Disney’s (DIS) ABC and GE’s (GE) NBC.

And I wouldn’t be shocked to see him murmur positive things about supplying online programming to Apple (AAPL), or Google (GOOG) for that matter, during tomorrow’s call. Stay tuned.

2010年8月2日星期一

Our Rotting Video-Game Heritage

Not long ago a film buff turned up a 90 year old film of Charlie Chaplin. It had not shown since 1914, and was utterly forgotten by film historians — yet because analog film technology has remained fundamentally unchanged since its invention, preservationists were able to re-debut the movie at a film festival in Virginia.

Read the rest of this post on the original site

2010年8月1日星期日

How to Copy DVD, Rip DVD, Convert Video on Mac

Many friends want to share their home-make DVDs and their DVD movies with others and also they always feel difficult to do that. Today I will share you a really easy way to Copy DVD to another DVD disc, DVD image ISO, or a DVD folder. Also I will also introduce you how to rip DVD and convert videos on Mac.

Part 1: How to copy a DVD to another DVD disc/DVD image ISO/DVD folder on Mac
Step 1: DVD Copy for Mac.
To copy a DVD on Mac, you need a DVD Copy for Mac to help you. Aiseesoft DVD Copy for Mac is a good choice.

DVD copy for Mac

Step 2: Load Your Source
This excellent DVD copy for Mac allows you to load DVD folder and DVD image ISO.

Step 3: Choose Output Info
1. "Full Disc" or “Main Movie”
This DVD copy for Mac enables you to copy the full disc and also the main movie according to your need.

2. "Audio", "Subtitle" and "Volume" name
You can choose your output audio from the "Audio" drop-down list, such as "all audio"/ "None"/ or some audio the DVD provide.

Subtitle is always an important thing, you can choose your output subtitle in "Subtitle" drop-down list.

You can also name your output volume's name

Step 4: Choose Your Target
You can copy your DVD to another DVD disc, DVD folder or DVD image ISO.

Tips:
1. You can also choose to copy the menus or not.
2. All the info you choose will be displayed on the "Info Box".

Part 2: How to rip DVD to video formats on Mac

Step 1: Download Aiseesoft DVD Ripper for Mac.

Step 2. Load DVD
Insert DVD into your DVD-ROM, run DVD Ripper for Mac, click "Load DVD", find the DVD folder of the movie you want to add from your DVD-ROM, and Click "Open".

DVD ripper for Mac

Step 3. Set output format.
This best DVD ripper for Mac provides you output formats as many as you want. Just choose one from the drop down list "profile" according to your portable player.

Step 4: Conversion
You can just Click "Start" to begin your conversion.

Part 3: How to Convert Video files on Mac

Step 1: Download Aiseesoft Video Converter for Mac

video converter for Mac

Step 2: Load video
Easily click "Add File" to load your video that you want to convert.

Step 3: Choose output profile and settings
At the bottom of the interface there are a drop-download list named "profile". You can choose your output format here.

Tips:
1. Trim
If you want to pick up a part of the video to convert, please click "Trim" button and drag the "Start trim slider" to set the start time and "End trim slider" to set the end time. (a) You can also do that by clicking the "Start trim button" and "End trim button" (b). The third way you do that is set the exact Start/End time at the right of the pop-up window and click "OK".(c)

trim

2. Crop
If you want to remove the black edges or you want to convert a certain area of your video, please click the "Crop" button. You can do this either by drag the frame around the movie (a) or set the crop value: "Top, Left, Bottom, Right".(b). Another way to do that is choose models from "Crop Mode"(c).
Aiseesoft Video Converter for Mac also allows you to chose the output aspect ratio above the crop pane, "Keep Original, full screen, 16:9 and 4:3" are available.

crop

3. Effect
If you want to adjust the effect of your movie, please click the "Effect" button and a pop-up effect window will appear. It allows you to edit your movie’s effect including "Brightness, Contrast, Hue, Saturation and Volume".

effect